| On-screen menu for Integra DTR 8.3 home theatre receiver |
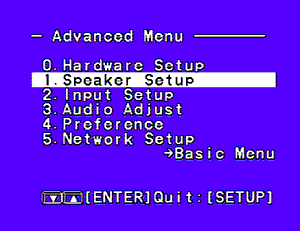
| Start here with the setup menu: |

|
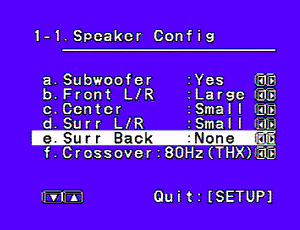
| Select speaker sizes here: |

|
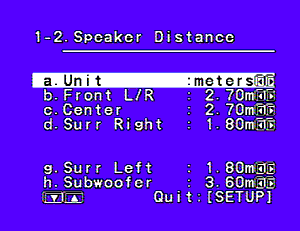
| The delay times are set by choosing the speaker distances: |

|
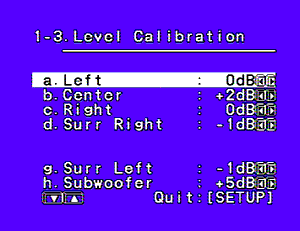
| The volume of each of the speakers can be boosted or cut to make them all the same level: |

|
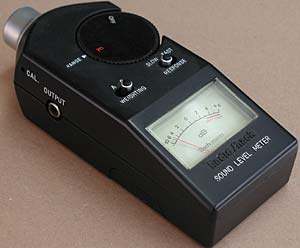
| Using something like this Radio Shack Sound Pressure Level Meter will make setting the levels much easier: |

|
Unfortunately, far too many systems don't sound anywhere near as good as they should, just for the lack of a little setting up. You ought to know about this for two reasons: so that the customers hear the best your surround sound systems have to offer, and so you can advise the purchasers on how to achieve the same quality at home.
The other five speakers ought to deliver sound at the same levels relative to each other as the movie makers intended. Most voices, for example, come out of the centre channel. If this isn't the right level, the dialogue might pound the watchers and be very tiring, or it might be too quiet. If the surround (or rear) speakers (the two that should be slightly behind the couch) are too loud, sounds that are supposed to be near the screen will sound like they are right in front of the viewers. Not good.
If a movie has a car door slamming on the front left speaker, with a little of the sound fed into the rear left speaker, and that rear speaker is a lot closer to you, guess where the sound will seem to be coming from? Time-alignment is a feature of home theatre systems that delays the sounds coming out of some of the speakers so that they all seem to be the same distance from you.
To start the process, look for a key on the remote control called 'setup'. Very rarely it's called something else. You may (horror!) have to consult the unit's manual in this case.
Now, how you use the setup functions varies according to whether the receiver (or box of electronics) has an on-screen display. If it does, then plugging the receiver into a TV (using either the composite video or S-Video monitor output on the back) makes things easier. If it doesn't, you'll have to make do with the display on the front of the receiver. Either way, the setup key brings up a menu, from which you can select the necessary options. The one we're interested in will be called something like 'Speaker Setup'.
Here you will set the speaker size. 'Large' speakers get the unadulterated sound from the movie. 'Small' ones have the bass yanked out (don't worry, it's redirected to the subwoofer). And here you will also set the channel balance. Most systems have a test tone, which pumps some noise out of each of the channels in turn. This should sound at the same volume for each channel. If not, as it cycles through you can adjust the level of a particular channel up or down to make it match the others.
Doing this with just your ears is hard. See the store manager and ask if petty cash can spring for $49.94 for a Sound Level Meter from Tandy Electronics. You want the one with the swinging-needle meter, not the digital display: catalogue number formerly 33-2050, now Q1461. This makes things a lot easier, especially balancing the subwoofer. On the meter set the 'Weighting' switch to 'C' and the 'Response' switch to 'Slow'.
If the system requires you to enter delay times instead, don't worry. You measure the distance to the front speakers. Then measure the distance to the rear speakers. Subtract this measure from the first one. Let's say this comes to one metre (that is, the rear speakers are a metre closer than the front speakers). Multiply by three and this is the number you enter in the menu for the rear speaker: 3 milliseconds (sound travels around 330 metres per second).
© 2003 by Stephen Dawson